Case Study: Tackling Surprises in Tight Guest Bath Shower Install
A 3’x4’ semi-curbless shower in a client's guest bath, with a 6-ft full-size wall-to-wall vanity installed on the opposing wall was the perfect opportunity to use the Gruen shower system.
A recent project presented the perfect opportunity to use the Gruen shower system in a fairly confined space. A 3’x4’ semi-curbless shower in a client's guest bath, with a 6-ft full-size wall-to-wall vanity installed on the opposing wall, proved challenging before the tile even started going in.
This particular project was to be executed with the trusted contractor I've worked with in the past, who's remodeled this particular home many times before. A rogue piling we found in the wall prevented an infinity niche from being installed, and the studs required more shimming and trimming than initially expected. After removing some excess lumber and using the power planer to shave down some bowed 2’x4’s, I used RodKat foam shims from East Coast Foam to flatten the walls before installing GoBoard tile backer board with Maxisil Maxi Grab.
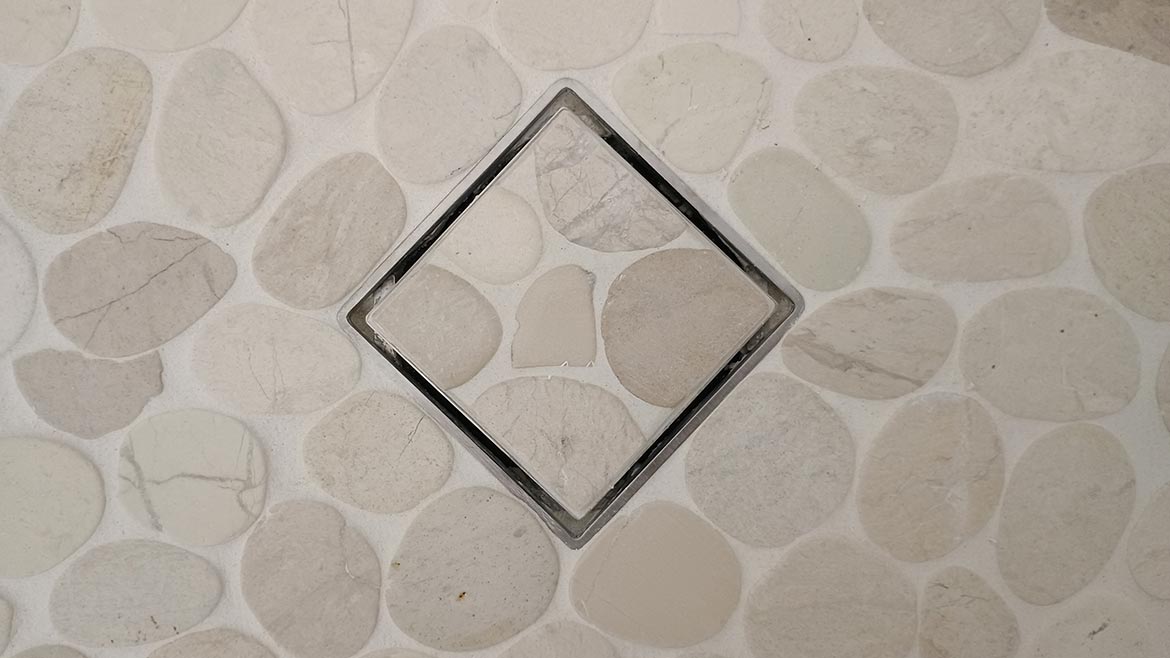
Gruen Point Drain with integrated fabric waterproofing. Photo: Ballin.
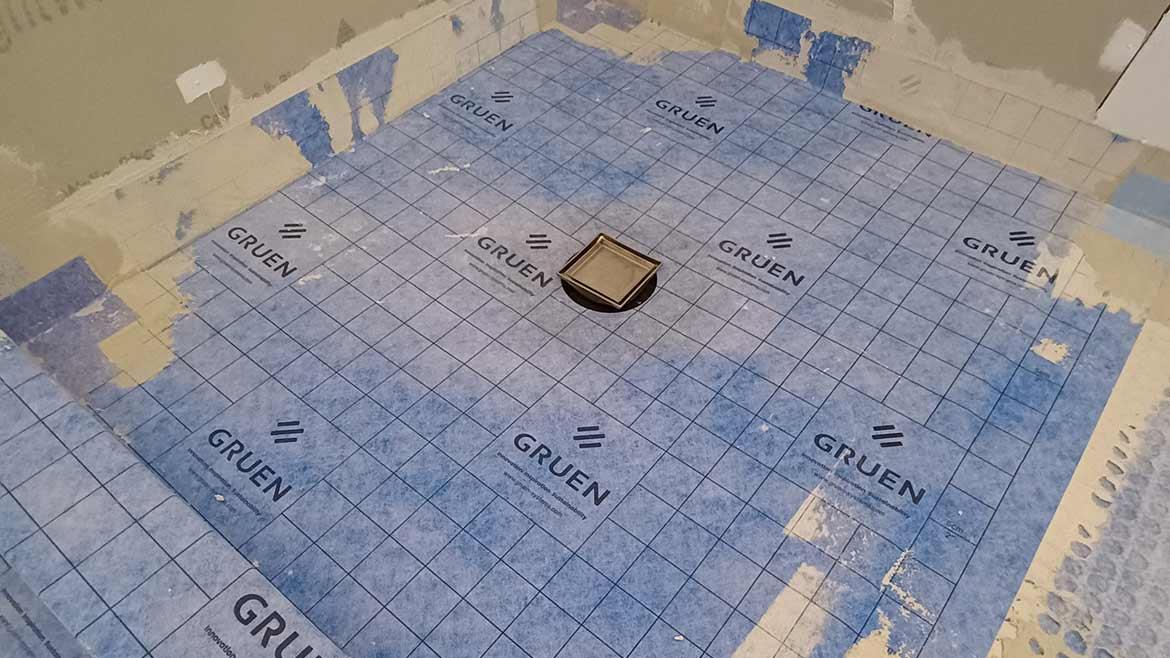
For this shower, I used the Gruen Point Drain with integrated fabric waterproofing. It comes with a piece of fabric that's approximately 4 feet by 6 feet sealed to the drain right from the factory. The pans and curbs are made of a high density compressed foam and seem to be a bit more resistant to denting if leaned on. They were fairly easy to cut as well.
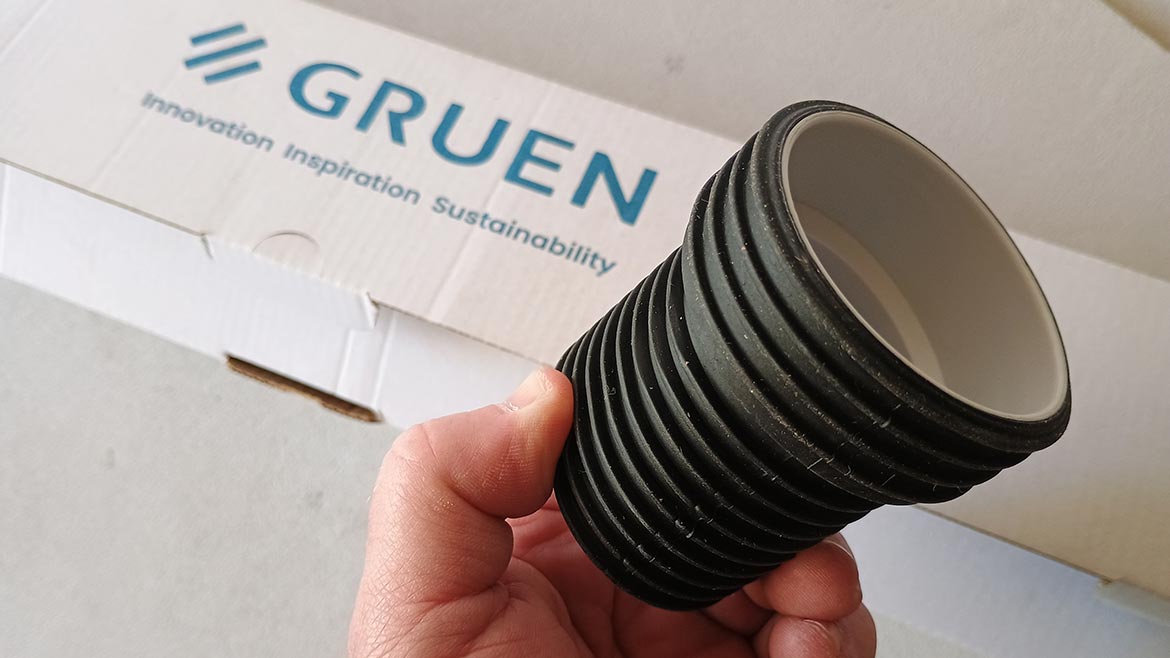
Gruen Connect coupler for drain. Photo: Ballin.
One of the most interesting features is the Gruen Connect coupler that makes the drain connection. The rubber coupler has ribs that allow it to be pressed into the drain and both PVC or ABS pipe without the need for glue. I can't count the number of times I've gone into the truck for glue and found that it has solidified, requiring an emergency trip to the store.
This fabric is then installed in the same manner as any other with thinset and a V-notch trowel. Overall, Gruen has an extremely versatile system that allows the installer to pick and choose their favorite components or utilize the full system together. They also have a drain connection that allows for simple integration into existing three-piece drains with a mud bed.
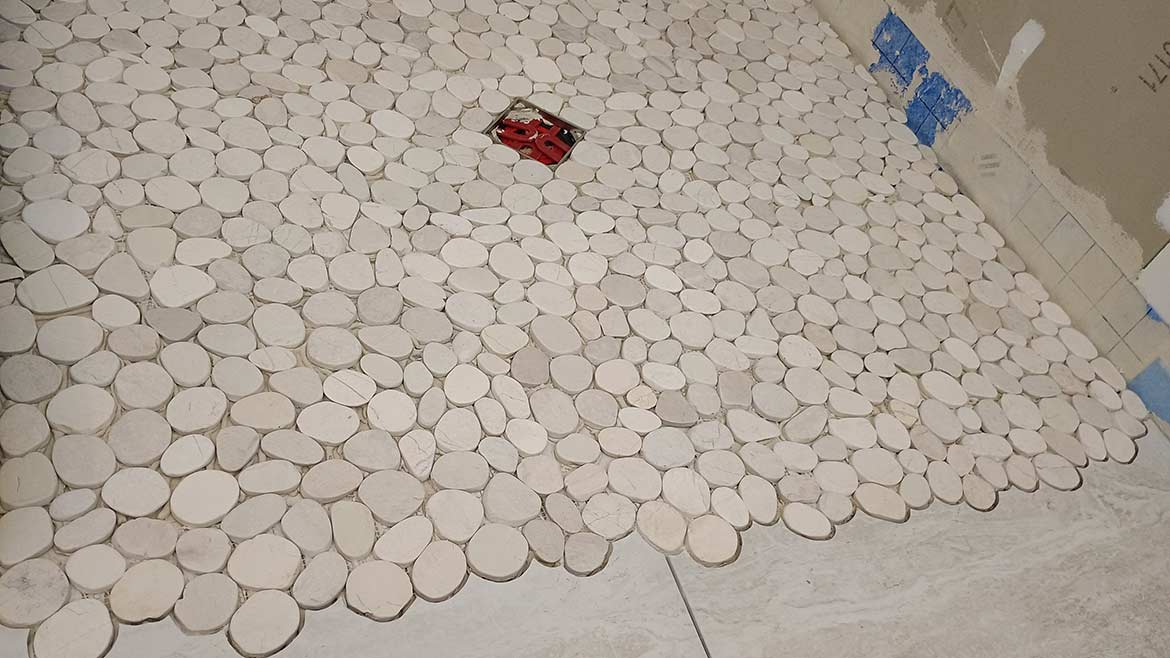
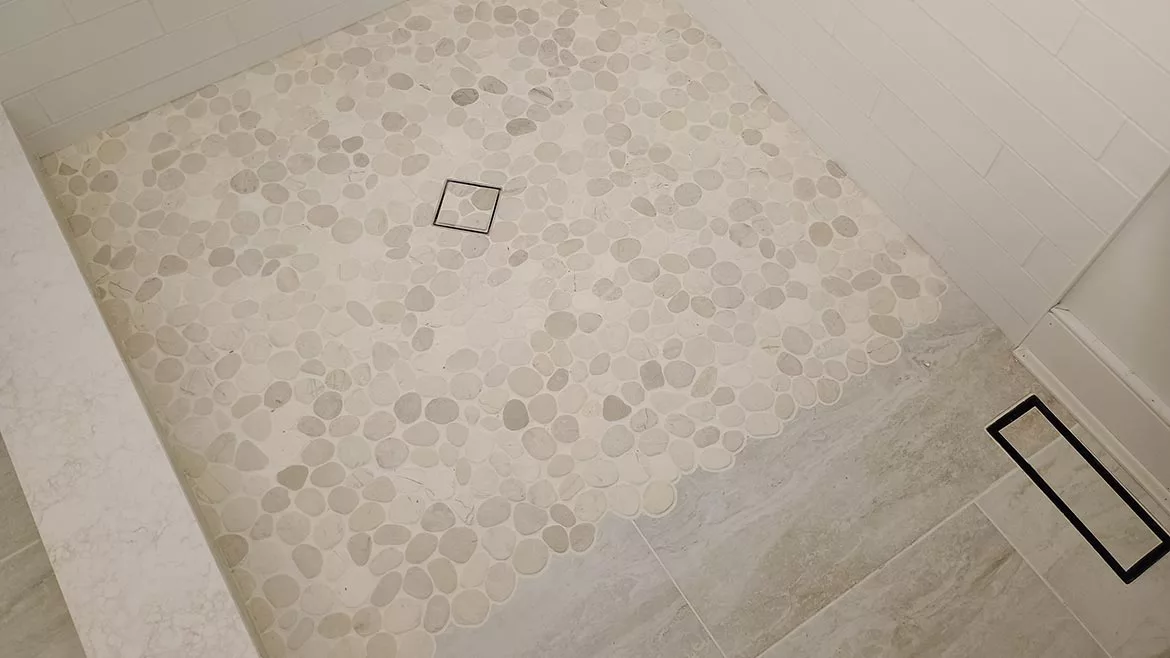
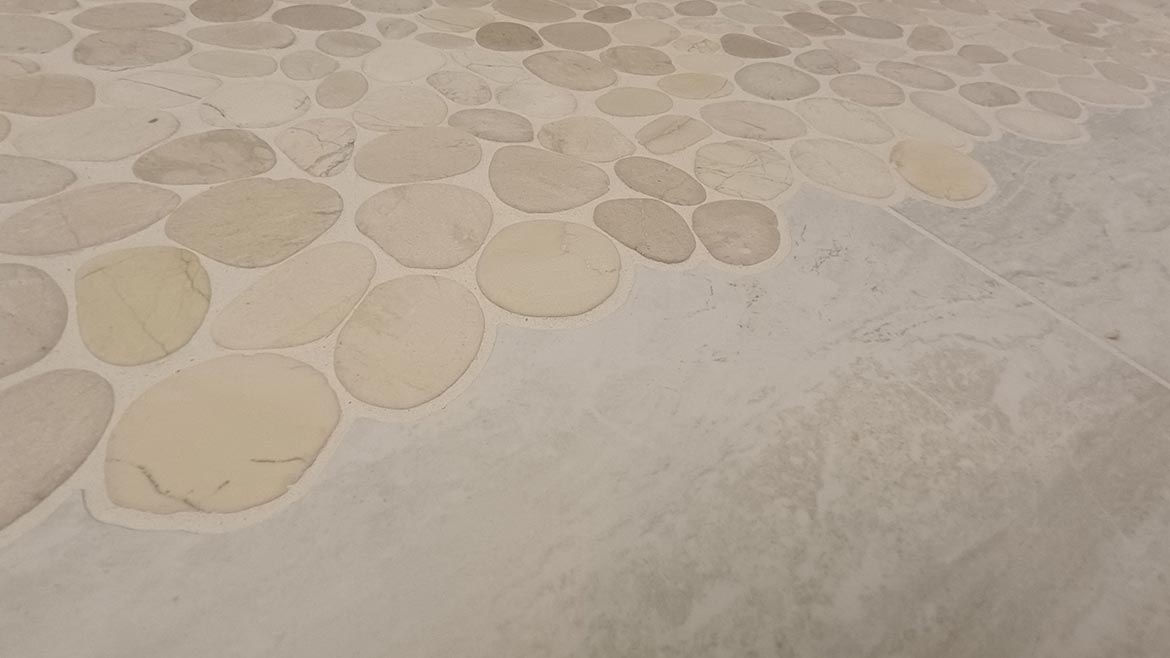
Pebble tile scribed into the field tile. Photo: Ballin.
The bathroom floor was getting 12”x24” porcelain tiles; the walls we're getting 3”x8” Subway tile with the irregular edge; and the pan was getting cut pebbles from Island Stone. Since we don't see pebbles in nature with cut edges, I wanted to maintain their natural whole shape and scribe them into the field tile. I've used this process many times on previous projects, and I'm always looking for different and more efficient ways to execute it. In this case, I dry laid the pebbles across the entrance to the shower and traced them with the marker. Then onto the IQ Power Tools Cyclone Dry Cut Tile Saw to cut the tile up to the line and polish the edges with some diamond pads / barrels from Helix.
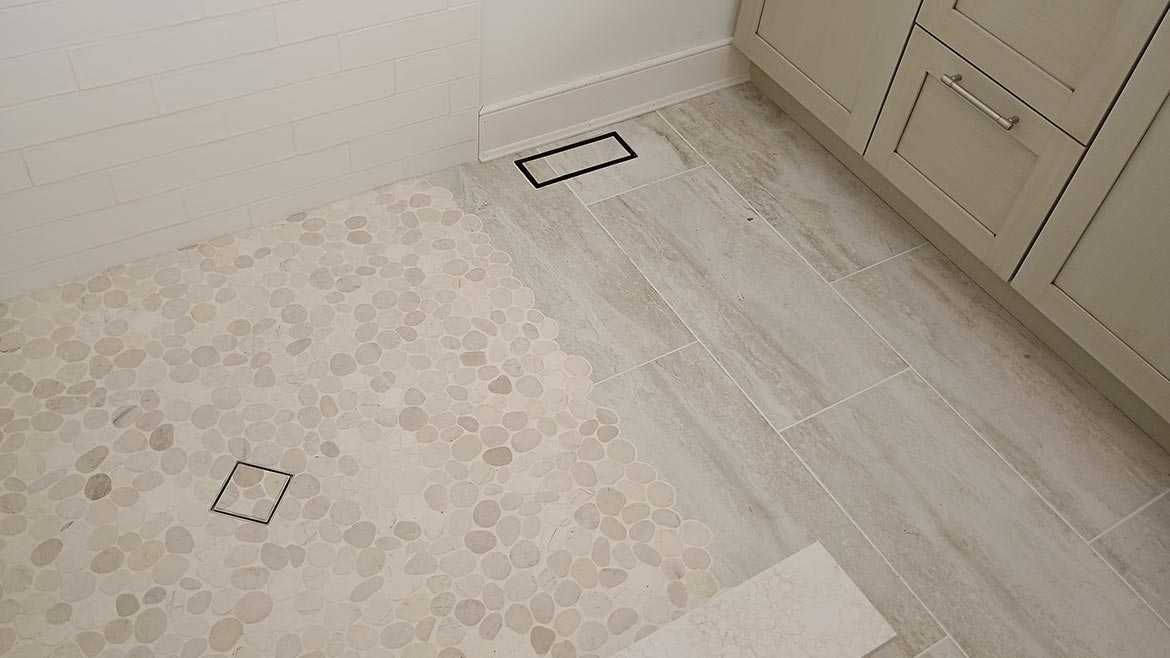
A seamless transition from the pebbles to the floor tile. Photo: Ballin.
The floor tiles were set with Bostik Big Tile & Stone thinset and the Euro Notched Trowel. I was sure to spread the thinset into the pan so the pebbles would sit at the same height as the floor tile and I could press them down flush with my grout float, keeping the transition to the pebbles seamless. After some adjustments for spacing, I switched to 1/4" by 3/8" trowel and then one last time to a 1/4"x1/4" trowel for the final stretch to the drain using the grout float to keep all the pebbles at the same height. The tile was then grouted with Bostik Hydroment Vivid grout and Maxisil wet location 100% silicone.
The finished shower and up close view of the drain. Photos: Ballin.
This bathroom took a few weeks to complete from start to finish and was a great opportunity to work with the Gruen system. Aside from the components that I've used personally, they've also got a nice line of linear drains that can be cut to size and a new tileable wall drain that I was able to see at Coverings this year. Overall, a smooth project with a few challenges that came together at the end. On to the next adventure!
Looking for a reprint of this article?
From high-res PDFs to custom plaques, order your copy today!


