Common Resilient Floor Problems and Solutions
When installing resilient flooring, be careful not to contaminate the seams with dirt. During the seaming process, give the adhesive enough open time or peaked seams may result. Also, when applying seam sealer, ensure the sealer is free of debris.
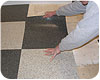
Seams are by far the most important aspect of the entire resilient flooring installation process. They are one of the major concerns of the end-user. This can be due in part to a customer’s past experience with a bad seam; for example, he or she was oversold that a seam would be “invisible.” The industry standard is slightly different. It states that a seam should be inconspicuous from a standing position.
In today’s market, it’s more important than ever to get seams right. Following are some common problems and solutions.
Dirt in Seams
Whenever there is a cut in a piece of resilient material and dirt is allowed to enter the cut, and then a sealer, coating or floor finish is applied, there is going to be an accentuation of the cut. Any type of clear substance applied over a seam is going to magnify the cut. The lighter the color of the flooring material, the more this line is going to be accented. In order to prevent a seam contamination from occurring, the installer must keep the installation clean. This means controlling the tracking in of dust or dirt, and eliminating dusty job conditions and keeping other trades from tracking in other kinds of soil.
If a seam is soiled, the best way to clean it is with a white toothpaste on a soft fine bristle toothbrush to scrub the seam. Next, rinse the seam with a damp white cloth and allow the seam to thoroughly dry before any seam treatment is applied. Toothpaste is a mild cleaner/abrasive and will do an excellent job of cleaning the seam. Avoid using any type of solvents on seams.
Gaps in Seams
A seam that is going to receive a topical treatment must be together net as most seam sealers will not bridge a gap. During installation the installer must do their utmost to keep the seam together. This means double-checking recess scribes, placing a scrap under double-cut seams and holding the cutting instrument square to the material when cutting any seam. If a gap occurs, the installer should attempt to pull the seam together by using a strong paper masking tape or a nylon filament tape. If the installer cannot pull the material together then they must look at inserting a sliver of material, insetting a new piece of material or replacing the entire piece of material.
Miscuts in Seams
A miscut seam is caused by a lack of installer concentration or experience and it is the hardest problem to hide and repair. Some of the basic problems and causes are:
Trying to cut material too fast. The installer places too much pressure on the knife causing them to lose control, especially in a recess scribe seaming process. Seaming is the most important portion of the installation, so take your time.
Cutting into the substrate. A wandering knife can cut into the substrate or pick up the grain of a wood underlayment.
Pulling away from the scribe line. This occurs when too much pressure is applied or a dull knife is used.
Improper seams are caused by not using a proper seaming technique as recommended by the manufacturer. Other causes include not using the proper cutting instrument. Many installers have problems with notched blade knives and/or blades that are too thin.
The best way to correct a miscut seam is to attempt to pull it together, and if that fails insert a new piece of material.
Insetting a Piece of Material into the Seam
Sometimes rather than replacing an entire width of material, it is acceptable to insert a “saddle,” a 6” or 8” piece of material inset on both sides of a seam. The use of a saddle should only be done with the customer’s permission. A saddle is also used with materials that have been installed for some time and later developed a seam problem because the seam was not installed correctly.
The saddle is inserted by using the same material or a contrasting color giving the impression of a custom installation, thereby saving the cost of an entire replacement. The tough sell is convincing the customer that two seams will correct the problem.
Dirty Seam Sealer
Whenever a seam sealer is applied, every precaution must be taken to prevent the sealer from becoming contaminated from foot traffic, pets, other tradesmen and airborne dirt. If there is the slightest possibility of contamination the seams should be covered. If a seam is contaminated and the sealer is fresh, the sealer can be removed with a white cloth dampened in naphtha or cigarette lighter fluid.
If the seam is dry, applying a small amount of seam sealer with a cotton swab and allowing it to set for a short time can reactivate some sealers. After reactivation, the sealer can then be removed with a rag dampened with naphtha or cigarette lighter fluid. If this does not work tape off both sides of the seam with paper masking tape and, using a wet and dry (silicone carbide) sandpaper of 320 or 400 grit, wet sand the seam sealer until the contaminated area is removed. After removal and thorough cleanup, use a cotton swab and apply a very thin coat of fresh sealer.
Dirty Seam Coating
Seam coatings are handled much the same way as seam sealers. If freshly applied, the coating can be cleaned with naphtha or cigarette lighter fluid. If dry coatings cannot be reactivated by the application of fresh coating material, the wet and dry sanding method mentioned above for seam sealers is the only alternative solution.
Peaked Seams
There are several causes for seams to peak in linoleum and inlaid sheet vinyl. Edge curl occurs at three different times and has three different causes. The first occurs prior to the applying adhesive and is generally caused by improper handling or back rolling. The second occurs just prior to/during the seaming process and is caused by the adhesive application or lack of open time. The third occurs after the seam is cut. Peaking occurs as a result of the seam being cut too tight or the seam was straight edged and butted.
Once a seam starts to peak an installer tends to go back and hand roll the material several times, applying more pressure with each rolling until they have pushed the entire adhesive away from the seam, leaving nothing to achieve a bond. When the initial rolling does not produce a flattened seam, an installer should weight the seam until the adhesive builds enough body to hold the seam flat. Then reroll with a moderate downward pressure.
Peaked seams are not a material defect but, in fact, an installation-related problem. If seams are cut too tight it is extremely difficult to remove a tiny sliver of material from the seam edge. I have found a simple solution: Apply a strip of masking tape to the down piece of material to protect it and take a medium file and dress down the seam edge of the scribed edge of the seam, being careful not to raise that edge any more than necessary to prevent more edge curl.
The act of cutting a seam is a rudimentary skill that all professional installers learn. The difference between a cut seam and a long enduring seam is having the technical expertise to cut, adhere and seal the seam correctly, resulting in a seam that will last the life of the floor.
Looking for a reprint of this article?
From high-res PDFs to custom plaques, order your copy today!


