Leveling Overlay Innovator Creates Natural Stone-Look 'Forever Floors'
Sean Hansen, owner, Premier Overlay in Bellevue, Washington, has patented a new stone-look overlay called Levelstone.
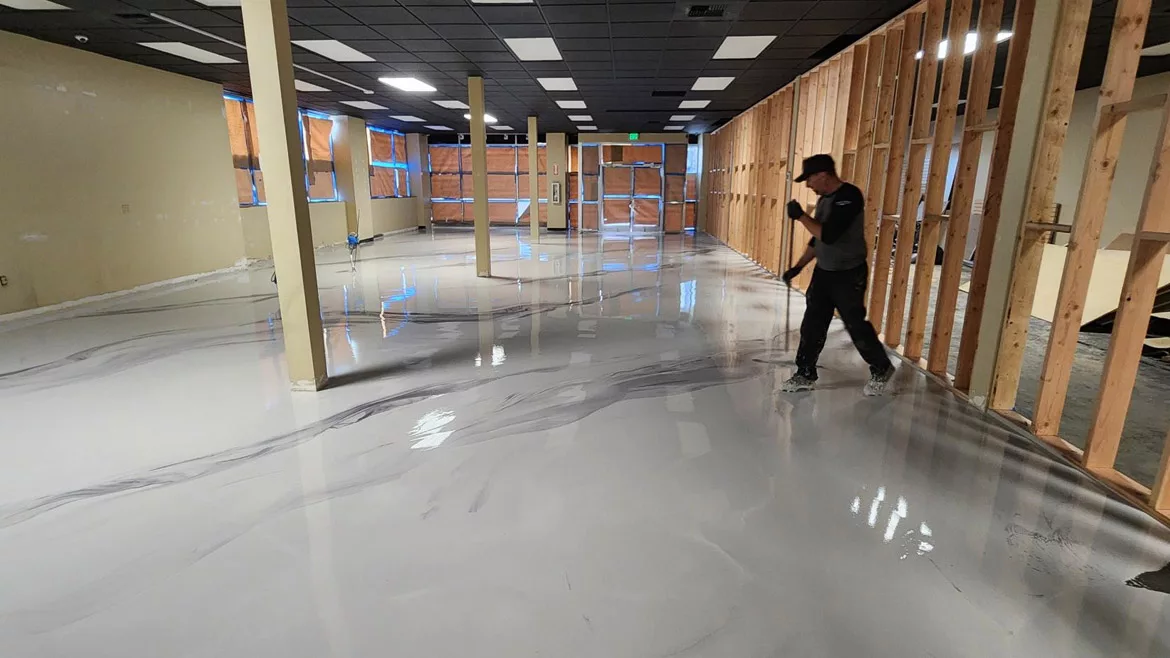
Photo: Sean Hansen.
For over 20 years, I have been installing both cementitious terrazzo and epoxy terrazzo as well as self-leveling overlayment along with underlayment in the Bellevue, Washington, area. Beside the many attributes of self-leveling overlayment, one main factor is to provide a consistent “salt and pepper” concrete look. New or old concrete can show the crème, salt and pepper and large aggregate all on the same cut. The solution is to install self-leveling overlay to give it the same look throughout. However, to achieve a seamless and natural look, the process is very time consuming, but we have pioneered a new method.
About 10 years ago, I began exploring different ways to achieve an organic look—more natural. Wood, tile, marble and stone are loved and desired for their beauty. I agree and was drawn to self-leveling overlayment for its ability to mimic those looks.
My dream is to create an organic “forever floor” that offers a seamless flow throughout the entire space—monolithic look—with veining and a mottled look that runs from one room or space to the next as if it was cut from one giant piece from a query. At the same time, it will never fail and can handle stains.
We are preparing to scale my process (currently in patent pending) and have come up with a brand name. Since we are using leveler that looks like stone, we are naming it Levelstone and now have the trademark.
The Benefits of Self-Leveling Overlay
Floors that look similar and are often confused with mine are epoxy floors. The problem with epoxy floors is they are credit-card thin and will peel up over time. Self-level overlay is a grand solution for several reasons.
If your floor is unlevel, overlay is a stand-alone solution. Unlike epoxy, it will last forever. The thickness is 1/4'” to 3/8” on average. It can be used to pre-level surfaces where needed. It is rated at 6000 psi so it is very strong compared to wood floors. It can achieve the “concrete look” if desired without the added weight. It weighs less than tile.
I have vigorously tested many sealers and coatings for their ability to protect the surface against stains and overall durability and am constantly evolving to find the world’s best. The tricky part of this is many solvent-based products react with the moisture coming from the recently poured overlay and risk peeling up or delaminating.
I am currently using a three-step sealer system using various sealers that won’t peel up and offer excellent stain resistance and durability.
The Process and Challenges
Meeting with the client to come up with a custom, beautiful, seamless and natural-looking floor is one of my favorite parts of the process. I get to hear what color or colors they want along with heavy or light mottling and vein flow.
When it comes to the installation process, there’s a great deal of trial and error on all the nuances that an installer comes across such as bonding to substrate, dealing with off-gassing, types of protection to use, best tooling, the installation of the overlay to many types of sealers and/or coatings. There are many challenges to take a porous product to this level. It’s always about prep along with using the world’s very best products and tooling.
We diamond grind the surface to create a heavy scratch profile. Next, we apply prep and epoxy primer with sand broadcast to the substrate to create the ultimate bond. My favorite part is next and that is the overlay. We move the material to create the natural effect. Once cured, we apply a three-step sealer process. Job complete! Installs typically average four to five days.
Pioneering a natural seamless look using overlay is the next generation of flooring. It is unknown to many and even less so the mottled overlay—very niche. It is exciting to offer a new flooring option to the world.
Looking for a reprint of this article?
From high-res PDFs to custom plaques, order your copy today!


